Recent Commercial Posts
Preventing and Responding To Workplace Fires
4/14/2022 (Permalink)
 Follow These Tips and Be ready for Workplace Fires.
Every year, businesses in and around South Boston, VA, are affected by fire damage. This is a leading cause of property damage as well as workplace injuries. As an employer or manager, there are several steps you can take to prevent fires and the burns that may result from fires.
Identify Common Causes of Workplace Fire Damage
The first step in prevention is education. Learn to recognize the most common workplace fire hazards, so you can take steps to avoid them:
- Overloaded power outlets
- Faulty wiring
- Old or damaged equipment
- Damaged electronics
- Unsupervised sources of heat
- Buildup of combustible materials
- Flammable liquids and compounds
- Improperly disposed of cigarettes
- Smoking near flammable or combustible items
- Negligence and human error
Your fire safety plan should include measures that prevent the ignition of a fire as well as those that reduce harm to your commercial property and the people doing business there.
Take Simple Steps To Reduce the Risk of Fire
For example, taking out the garbage each day, especially highly combustible items such as shredded paper and oily rags, helps you avoid serious fire damage. Other preventative actions include hiring professionals to maintain and inspect wiring, appliances, and electronics.
Make sure there's plenty of ventilation around your equipment and make sure electrical control panels are easy to reach. Properly store chemicals and explosive materials.
Train Your Employees To Increase Fire Safety
These trainings must happen repeatedly and consistently. This must include regular drills, as well as training in how to evacuate in case of a fire and how to perform burn first aid. One tip from emergency professionals is to assign every employee a task to complete during an emergency. This purpose helps individuals remain calm during the crisis.
Comply With OSHA Standards
The Occupational Safety and Health Administration sets safety standards for businesses. You may be required to have a fire suppression system in place as well as fire extinguishers, alarms, and first aid supplies. OSHA compliant first aid kits are available, but it is your responsibility to make sure that you have all necessary supplies on hand. Check with your local licensing and regulations bureau, the neighborhood fire department, or your insurance provider for specifics.
In general, however, you should have a variety of bandages and tape, antiseptics and antibiotics, cold packs, eye and skin washes, hand sanitizers, and sterile pads. If a fire breaks out in your workplace, you'll need to have burn dressings and treatments in your kit.
Prepare for Injuries
Burns may be caused directly by flames, steam, chemicals, or electricity. They may also be the result of high temperatures, hot liquids, and exposure to a heat source. If burns are major, professional medical treatment is essential. Major burns penetrate through multiple layers of skin, cause skin to be charred or dry and leathery, cover more than three inches, or are located in sensitive areas of the body.
Minor burns may be treated on the spot by first cooling the affected area, removing tight clothing or jewelry, applying a gentle, moisturizing lotion, and loosely bandaging the burn. Don't break open any blisters.
When fire damage occurs at work, a professional cleanup and recovery team will care for your property. It's up to you to ensure that your people are safe and cared for.
Preventing and Responding To Workplace Fires
4/14/2022 (Permalink)
Follow These Tips and Be ready for Workplace Fires.
Every year, businesses in and around South Boston, VA, are affected by fire damage. This is a leading cause of property damage as well as workplace injuries. As an employer or manager, there are several steps you can take to prevent fires and the burns that may result from fires.
Identify Common Causes of Workplace Fire Damage
The first step in prevention is education. Learn to recognize the most common workplace fire hazards, so you can take steps to avoid them:
- Overloaded power outlets
- Faulty wiring
- Old or damaged equipment
- Damaged electronics
- Unsupervised sources of heat
- Buildup of combustible materials
- Flammable liquids and compounds
- Improperly disposed of cigarettes
- Smoking near flammable or combustible items
- Negligence and human error
Your fire safety plan should include measures that prevent the ignition of a fire as well as those that reduce harm to your commercial property and the people doing business there.
Take Simple Steps To Reduce the Risk of Fire
For example, taking out the garbage each day, especially highly combustible items such as shredded paper and oily rags, helps you avoid serious fire damage. Other preventative actions include hiring professionals to maintain and inspect wiring, appliances, and electronics.
Make sure there's plenty of ventilation around your equipment and make sure electrical control panels are easy to reach. Properly store chemicals and explosive materials.
Train Your Employees To Increase Fire Safety
These trainings must happen repeatedly and consistently. This must include regular drills, as well as training in how to evacuate in case of a fire and how to perform burn first aid. One tip from emergency professionals is to assign every employee a task to complete during an emergency. This purpose helps individuals remain calm during the crisis.
Comply With OSHA Standards
The Occupational Safety and Health Administration sets safety standards for businesses. You may be required to have a fire suppression system in place as well as fire extinguishers, alarms, and first aid supplies. OSHA compliant first aid kits are available, but it is your responsibility to make sure that you have all necessary supplies on hand. Check with your local licensing and regulations bureau, the neighborhood fire department, or your insurance provider for specifics.
In general, however, you should have a variety of bandages and tape, antiseptics and antibiotics, cold packs, eye and skin washes, hand sanitizers, and sterile pads. If a fire breaks out in your workplace, you'll need to have burn dressings and treatments in your kit.
Prepare for Injuries
Burns may be caused directly by flames, steam, chemicals, or electricity. They may also be the result of high temperatures, hot liquids, and exposure to a heat source. If burns are major, professional medical treatment is essential. Major burns penetrate through multiple layers of skin, cause skin to be charred or dry and leathery, cover more than three inches, or are located in sensitive areas of the body.
Minor burns may be treated on the spot by first cooling the affected area, removing tight clothing or jewelry, applying a gentle, moisturizing lotion, and loosely bandaging the burn. Don't break open any blisters.
When fire damage occurs at work, a professional cleanup and recovery team will care for your property. It's up to you to ensure that your people are safe and cared for.
6 Essential Steps To Cleaning Up a Roof Leak
3/10/2022 (Permalink)
 Cleaning Up a Roof Leak will be Easier if you Follow These Essential Steps.
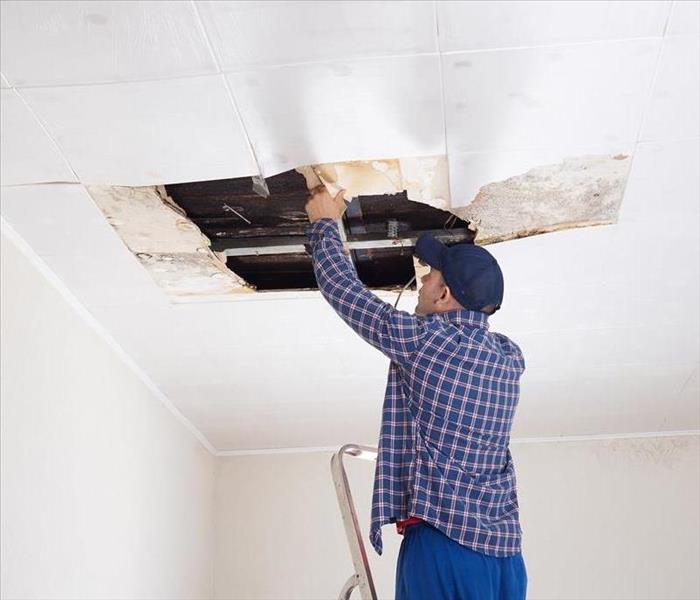
Business owners in South Boston, VA, may discover a roof leak well after it started. Unfortunately, openings within the structure often appear over time, gradually allowing moisture into the ceiling. Wood and insulation absorb the dampness, sometimes hiding it from plain view. Eventually, when enough harm happens, stains and leaks appear, finally signaling trouble.
Proprietors should take the situation seriously, grabbing more than a bucket and a mop—the roof and any attic structure demand close examination to determine the extent of the devastation. In addition, a thorough clean-up is required to avoid long-term harm and prevent extensive issues to the upper structure. Therefore, when employees or management observe a leak, be sure to follow the following six steps.
Six Essential Steps to Consider if you have to Clean Up a Roof Leak
1. Call Roof Leak Professionals
Business owners might think a quick patch to the ceiling solves the complication; however, that choice acts as a bandaid to what could be a much larger wound. Instead, it's imperative to locate the water intrusion's origin. Locate a local water remediation company, and request their assistance. These specialists begin by surveying the leak and determining the source. They then put together an action plan to resolve the primary problem and sanitize and restore the facility.
2. Tend to the Roof's Condition
Often the moisture gets into the building through damaged or missing shingles. Because they no longer cover the exterior adequately, they have allowed for a point of entry. Immediately seal it off, placing a tarp on top to minimize additional penetration.
3. Move Valuables to Another Room
Although water seems harmless, it poses quite a risk to your property and possessions. A leak that persists could drip consistently onto your products, furniture and equipment, causing them to break, rust or erode. Furthermore, trapped wetness leads to increased odor, mildew and mold, especially porous materials. Minimize your complications. Move possessions out of the way where they remain dry. This decision reduces loss and could save you time, hassle and money.
4. Eliminate Damp Materials
The restoration crew tests various surfaces to determine moisture levels. Expect the team to look at the damaged roof, ceiling and drywall. They will tear out anything meeting heavy saturation levels. The dampness encourages mold spore reproduction, and because these substances soak up quickly and easily, it's hard to know the depth of the concern. Removal lowers the chances of future contamination and difficulties.
5. Disinfect and Dry the Area
Unaffected portions may still have some dampness. Industrial dehumidifiers extract this fluid from the air and other surfaces. When testing indicates appropriate moisture levels, the experts may sanitize the space.
6. Restore for Regular Use
When the cleaning is done, repair the roof's integrity and rebuild the room to meet your company's needs. This step remains last because it's vital to know that any underlying issues are evaluated and tended to first.
A roof leak is a severe event, so don't allow it to linger. Something seemingly minor could significantly impact your building's structure and your valuable's integrity. Therefore, quickly secure the location from additional harm, and safeguard materials. Then, reach out to professionals to assist with the situation, allowing these experts to locate the problem's source, arrange for appropriate cleaning, and remediate the harm.
6 Essential Steps To Cleaning Up a Roof Leak
3/10/2022 (Permalink)
Cleaning Up a Roof Leak will be Easier if you Follow These Essential Steps.
Business owners in South Boston, VA, may discover a roof leak well after it started. Unfortunately, openings within the structure often appear over time, gradually allowing moisture into the ceiling. Wood and insulation absorb the dampness, sometimes hiding it from plain view. Eventually, when enough harm happens, stains and leaks appear, finally signaling trouble.
Proprietors should take the situation seriously, grabbing more than a bucket and a mop—the roof and any attic structure demand close examination to determine the extent of the devastation. In addition, a thorough clean-up is required to avoid long-term harm and prevent extensive issues to the upper structure. Therefore, when employees or management observe a leak, be sure to follow the following six steps.
Six Essential Steps to Consider if you have to Clean Up a Roof Leak
1. Call Roof Leak Professionals
Business owners might think a quick patch to the ceiling solves the complication; however, that choice acts as a bandaid to what could be a much larger wound. Instead, it's imperative to locate the water intrusion's origin. Locate a local water remediation company, and request their assistance. These specialists begin by surveying the leak and determining the source. They then put together an action plan to resolve the primary problem and sanitize and restore the facility.
2. Tend to the Roof's Condition
Often the moisture gets into the building through damaged or missing shingles. Because they no longer cover the exterior adequately, they have allowed for a point of entry. Immediately seal it off, placing a tarp on top to minimize additional penetration.
3. Move Valuables to Another Room
Although water seems harmless, it poses quite a risk to your property and possessions. A leak that persists could drip consistently onto your products, furniture and equipment, causing them to break, rust or erode. Furthermore, trapped wetness leads to increased odor, mildew and mold, especially porous materials. Minimize your complications. Move possessions out of the way where they remain dry. This decision reduces loss and could save you time, hassle and money.
4. Eliminate Damp Materials
The restoration crew tests various surfaces to determine moisture levels. Expect the team to look at the damaged roof, ceiling and drywall. They will tear out anything meeting heavy saturation levels. The dampness encourages mold spore reproduction, and because these substances soak up quickly and easily, it's hard to know the depth of the concern. Removal lowers the chances of future contamination and difficulties.
5. Disinfect and Dry the Area
Unaffected portions may still have some dampness. Industrial dehumidifiers extract this fluid from the air and other surfaces. When testing indicates appropriate moisture levels, the experts may sanitize the space.
6. Restore for Regular Use
When the cleaning is done, repair the roof's integrity and rebuild the room to meet your company's needs. This step remains last because it's vital to know that any underlying issues are evaluated and tended to first.
A roof leak is a severe event, so don't allow it to linger. Something seemingly minor could significantly impact your building's structure and your valuable's integrity. Therefore, quickly secure the location from additional harm, and safeguard materials. Then, reach out to professionals to assist with the situation, allowing these experts to locate the problem's source, arrange for appropriate cleaning, and remediate the harm.
How To Clean a Toilet Overflow
2/19/2022 (Permalink)
 A Toilet Overflow in your South Boston, VA property can be a real Problem. If you have more questions, just contact us.
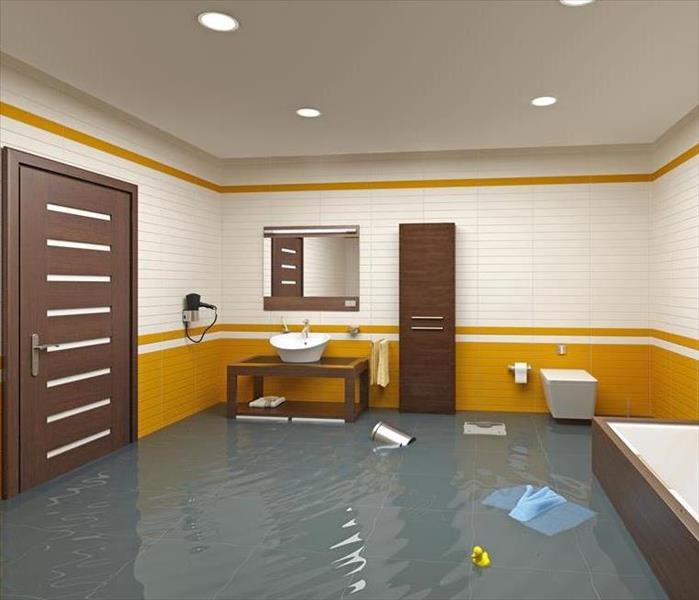
Flood water from a backed-up toilet is an unpleasant problem that can create a variety of issues for business owners. Cleaning up the mess and getting the toilet working again is critical for avoiding these problems.
What To Do When You Have a Toilet Overflow
Both the water and the bacteria from a toilet flood can cause more damage the longer it takes to clean it up. As soon as possible after the overflow occurs, take steps to fix the problem:
1. Shut off the Water
Most toilets have a shut-off valve located under the toilet tank. Turn this valve to the off position. If there is no shut-off on the supply line, turn the water off at the mainline. If you continue to have an overflow problem with the water shut off, you may have a problem with your main sewer line or drain pipe.
2. Clear the Blockage
You may be tempted to reach for a plunger, but it may just create more flood water. Instead, use a toilet auger or drain snake. Toilet augers work similarly to drain snakes but are designed to work better with your toilet's s-shaped trap. Insert the auger into the toilet drain and crank it to feed the auger into the drain pipes.
Hopefully, the auger will snag the clog so you can pull the drain out. It may also break the clog into smaller pieces that will pass through the drain.
3. Remove Standing Water and Waste
The longer water remains on the floor of your bathroom, the more damage it is likely to do to your flooring. It may also soak into cabinets and walls which may spread bacteria or cause mold to grow. If the water from the toilet was clean, you may be able to remove it yourself. However, if there is any fecal material in the water, it is better to contact a remediation company in South Boston, VA. Removing contaminated water requires safety gear and training that your staff may not have.
4. Dry Out Your Property
If you are working with a remediation company, it can help you dry out your property. If not, you can use industrial fans to speed the drying process.
5. Clean and Disinfect the Bathroom
Wash all surfaces in the bathroom with warm water and soap. Mix one cup of bleach with one gallon of water. Soak a cloth or sponge in the mixture and wipe down all surfaces.
Avoid Future Problems
Most overflows are caused by clogs and most clogs are caused by flushing materials down the toilet that shouldn't be flushed. Post signs in your restrooms advising employees, customers and guests not to flush diapers, paper towels, sanitary products or solid objects. Flushable wipes can also cause clogs, so you may want to add them to your list. Make sure you provide an appropriate receptacle for people to dispose of these objects.
If you have flood water from a toilet, cleaning it safely and quickly is the key to avoiding other problems. Taking steps to avoid clogs will help you avoid another bathroom emergency.
How To Clean a Toilet Overflow
2/19/2022 (Permalink)
A Toilet Overflow in your South Boston, VA property can be a real Problem. If you have more questions, just contact us.
Flood water from a backed-up toilet is an unpleasant problem that can create a variety of issues for business owners. Cleaning up the mess and getting the toilet working again is critical for avoiding these problems.
What To Do When You Have a Toilet Overflow
Both the water and the bacteria from a toilet flood can cause more damage the longer it takes to clean it up. As soon as possible after the overflow occurs, take steps to fix the problem:
1. Shut off the Water
Most toilets have a shut-off valve located under the toilet tank. Turn this valve to the off position. If there is no shut-off on the supply line, turn the water off at the mainline. If you continue to have an overflow problem with the water shut off, you may have a problem with your main sewer line or drain pipe.
2. Clear the Blockage
You may be tempted to reach for a plunger, but it may just create more flood water. Instead, use a toilet auger or drain snake. Toilet augers work similarly to drain snakes but are designed to work better with your toilet's s-shaped trap. Insert the auger into the toilet drain and crank it to feed the auger into the drain pipes.
Hopefully, the auger will snag the clog so you can pull the drain out. It may also break the clog into smaller pieces that will pass through the drain.
3. Remove Standing Water and Waste
The longer water remains on the floor of your bathroom, the more damage it is likely to do to your flooring. It may also soak into cabinets and walls which may spread bacteria or cause mold to grow. If the water from the toilet was clean, you may be able to remove it yourself. However, if there is any fecal material in the water, it is better to contact a remediation company in South Boston, VA. Removing contaminated water requires safety gear and training that your staff may not have.
4. Dry Out Your Property
If you are working with a remediation company, it can help you dry out your property. If not, you can use industrial fans to speed the drying process.
5. Clean and Disinfect the Bathroom
Wash all surfaces in the bathroom with warm water and soap. Mix one cup of bleach with one gallon of water. Soak a cloth or sponge in the mixture and wipe down all surfaces.
Avoid Future Problems
Most overflows are caused by clogs and most clogs are caused by flushing materials down the toilet that shouldn't be flushed. Post signs in your restrooms advising employees, customers and guests not to flush diapers, paper towels, sanitary products or solid objects. Flushable wipes can also cause clogs, so you may want to add them to your list. Make sure you provide an appropriate receptacle for people to dispose of these objects.
If you have flood water from a toilet, cleaning it safely and quickly is the key to avoiding other problems. Taking steps to avoid clogs will help you avoid another bathroom emergency.
How To Troubleshoot a Commercial Irrigation System
1/13/2022 (Permalink)
 Follow these Steps if you are dealing with Irrigation Problems. If any doubt arises, please contact us.
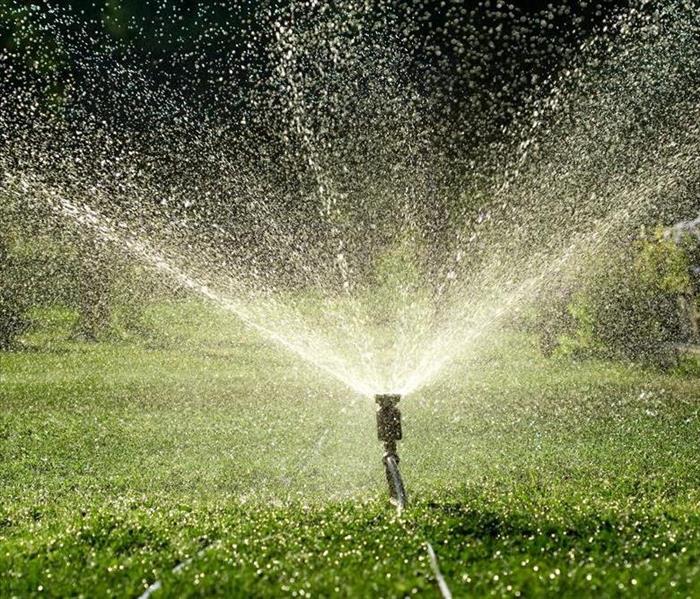
An irrigation system can be a valuable tool for maintaining your landscaping or commercial farming operations during dry weather. However, irrigation systems sometimes develop problems that require troubleshooting.
Troubleshooting Steps for Irrigation Problems
Some issues may require you to contact a professional repair company in South Boston, VA; however, before you call a pro it can be useful to troubleshoot the problem. You may be able to fix simple problems yourself or identify the issue so that you do not have to pay for someone else to find it.
1. Check for Damaged Sprinkler Heads
Inspect sprinkler heads for damage to the plastic casing, sprinkler heads that do not pop up, heads that are broken off and water that does not spray or sprays erratically. Repair or replace damaged sprinkler heads or make note of their location so a professional can do it.
2. Clean Sprinkler Heads
Sometimes cleaning a sprinkler head will get it working again. Remove any debris from your malfunctioning sprinkler heads, reset the spray pattern and check if the head works correctly the next time the system activates. If the head is still not functioning, it will probably need to be replaced.
3. Inspect the Backflow Device
If you are experiencing low water pressure in your irrigation system, inspect your backflow device. The backflow device is usually positioned near where the water pipe extends down to the valves that direct the water to separate sources. Make sure the water valves are turned on.
4. Check for Leaking Pipes
Leaking pipes can be a serious problem that not only prevents your system from working but could lead to property damage that requires remediation. Pipe leaks are most likely to occur between the valves and the first sprinkler head. Pools of water on your lawn can indicate a pipe leak.
5. Look for Problems With the Irrigation Line
If you can't find an obvious leak, your irrigation line could be compressed or crushed which can restrict water flow. This type of damage may be caused by tree roots or driving vehicles over-irrigation lines. Unfortunately, to locate the problem, you may need to dig up your property until you locate the damaged line.
6. Check Your Voltage
Sprinkler zones that fail to activate are often the result of electrical problems. Use a multimeter to test the voltage between the zone terminal and the common terminal. If it reads lower than 24 to 28 volts, you may need to replace the controller.
7. Inspect the Low-Voltage Wires
Low-voltage wires leading from the controller to the zone valve's solenoid can cause zones to fail to activate if the wires are disconnected or damaged. Inspect the wires for damage and make sure they are properly connected to the zone valve solenoid and the controller.
8. Check the Valve Solenoid
Sometimes the solenoid on the valve can go bad. You can check this by turning the controller off, removing the existing solenoid and connecting a new one to see if that fixes the problem. Problems with your irrigation system can be tedious and difficult to identify. However, learning to troubleshoot your system can save you money on repairs.
How To Troubleshoot a Commercial Irrigation System
1/13/2022 (Permalink)
Follow these Steps if you are dealing with Irrigation Problems. If any doubt arises, please contact us.
An irrigation system can be a valuable tool for maintaining your landscaping or commercial farming operations during dry weather. However, irrigation systems sometimes develop problems that require troubleshooting.
Troubleshooting Steps for Irrigation Problems
Some issues may require you to contact a professional repair company in South Boston, VA; however, before you call a pro it can be useful to troubleshoot the problem. You may be able to fix simple problems yourself or identify the issue so that you do not have to pay for someone else to find it.
1. Check for Damaged Sprinkler Heads
Inspect sprinkler heads for damage to the plastic casing, sprinkler heads that do not pop up, heads that are broken off and water that does not spray or sprays erratically. Repair or replace damaged sprinkler heads or make note of their location so a professional can do it.
2. Clean Sprinkler Heads
Sometimes cleaning a sprinkler head will get it working again. Remove any debris from your malfunctioning sprinkler heads, reset the spray pattern and check if the head works correctly the next time the system activates. If the head is still not functioning, it will probably need to be replaced.
3. Inspect the Backflow Device
If you are experiencing low water pressure in your irrigation system, inspect your backflow device. The backflow device is usually positioned near where the water pipe extends down to the valves that direct the water to separate sources. Make sure the water valves are turned on.
4. Check for Leaking Pipes
Leaking pipes can be a serious problem that not only prevents your system from working but could lead to property damage that requires remediation. Pipe leaks are most likely to occur between the valves and the first sprinkler head. Pools of water on your lawn can indicate a pipe leak.
5. Look for Problems With the Irrigation Line
If you can't find an obvious leak, your irrigation line could be compressed or crushed which can restrict water flow. This type of damage may be caused by tree roots or driving vehicles over-irrigation lines. Unfortunately, to locate the problem, you may need to dig up your property until you locate the damaged line.
6. Check Your Voltage
Sprinkler zones that fail to activate are often the result of electrical problems. Use a multimeter to test the voltage between the zone terminal and the common terminal. If it reads lower than 24 to 28 volts, you may need to replace the controller.
7. Inspect the Low-Voltage Wires
Low-voltage wires leading from the controller to the zone valve's solenoid can cause zones to fail to activate if the wires are disconnected or damaged. Inspect the wires for damage and make sure they are properly connected to the zone valve solenoid and the controller.
8. Check the Valve Solenoid
Sometimes the solenoid on the valve can go bad. You can check this by turning the controller off, removing the existing solenoid and connecting a new one to see if that fixes the problem. Problems with your irrigation system can be tedious and difficult to identify. However, learning to troubleshoot your system can save you money on repairs.
What To Expect From Black Mold Remediation
11/19/2021 (Permalink)
 When Black Mold shows up in your South Boston, VA, building, don't hesitate to call us.
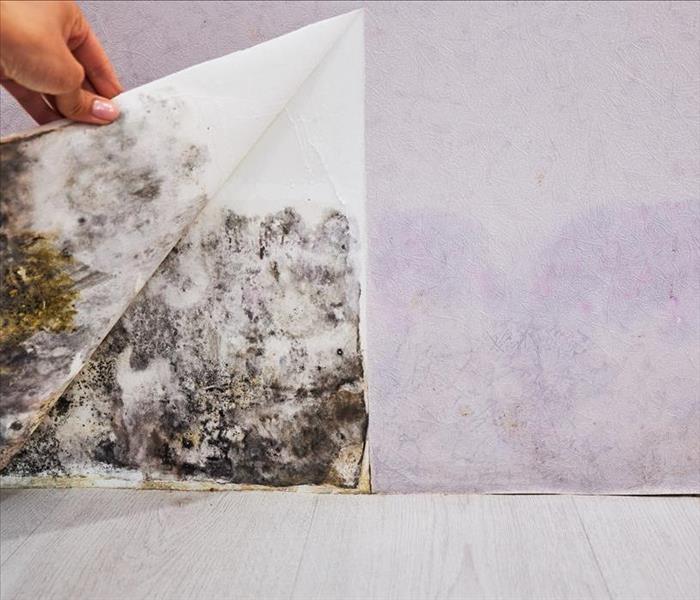
When you spot black mold in your South Boston, VA, building, your next actions will either positively or negatively impact your property. Although mold is a natural part of the environment and can quickly take up residence in just about any environmental conditions, it can cause a lot of trouble for you as a property owner. You need professional mold remediation as quickly as possible.
6 Steps in the Treatment of Black Mold
If it isn't treated quickly, mold will spread through your building and may travel to other buildings on your property. Some of the following steps will be taken by professionals, and some are your responsibility:
1. Assessments and Reports
A mold inspector will complete a thorough assessment, test moisture levels, and check air quality. This professional will carefully document the type of molds in the area and determine how far mold colonies have spread. The completed report may be shared with you, your insurance agency, and the remediation company.
2. Prevention and Preparation
Before the mold cleanup crew arrives, there are a couple of things you should do. The first is to identify any problematic sources of water. Figure out whether a cracked pipe or a leaky air conditioner caused the black mold. A mold issue won't be fully resolved until the source of moisture has been corrected.
You also need to prepare a path to the affected area. Remediation crews often have a lot of equipment and will need to have plenty of room to maneuver.
3. Containment and Personal Protection Equipment
The cleanup and remediation process often releases mold spores from behind drywall or underneath carpeting. To prevent those spores from spreading throughout your building, technicians may put up plastic sheeting and close off the area where they are working. It's important that you keep the HVAC system turned off and limit any traffic through the affected space. Technicians may also wear boots, gloves, and other protective clothing to prevent the spread of spores.
4. Removal of Affected Materials
Any affected building materials that can't be cleaned will be removed from the building. This generally includes most porous items. Technicians may double bag drywall, carpeting, and other materials before disposing of them.
5. Cleanup and Disinfection
Mold cleanup crews may begin by applying a biocide to kill mold and prevent any further spread. Bleach is not a biocide. The chemicals used by professionals are approved by the EPA and may not be commonly available. After a waiting period for the biocide to kill the mold, crews will wipe up the mold or use specialized vacuums. The area may be repainted or whitewashed to seal the remaining materials and prevent new growth.
6. Time for Drying and Final Assessment
Once all of the treated surfaces have dried, the mold inspector will return to test for spores and to check air quality again. With the final assessment and reports complete and the original cause of mold growth has been corrected, it should be safe for people to return to the area. Black mold can cause a lot of damage in your building, but if you catch and treat it quickly, you can limit that danger and minimize any inconvenience.
What To Expect From Black Mold Remediation
11/19/2021 (Permalink)
When Black Mold shows up in your South Boston, VA, building, don't hesitate to call us.
When you spot black mold in your South Boston, VA, building, your next actions will either positively or negatively impact your property. Although mold is a natural part of the environment and can quickly take up residence in just about any environmental conditions, it can cause a lot of trouble for you as a property owner. You need professional mold remediation as quickly as possible.
6 Steps in the Treatment of Black Mold
If it isn't treated quickly, mold will spread through your building and may travel to other buildings on your property. Some of the following steps will be taken by professionals, and some are your responsibility:
1. Assessments and Reports
A mold inspector will complete a thorough assessment, test moisture levels, and check air quality. This professional will carefully document the type of molds in the area and determine how far mold colonies have spread. The completed report may be shared with you, your insurance agency, and the remediation company.
2. Prevention and Preparation
Before the mold cleanup crew arrives, there are a couple of things you should do. The first is to identify any problematic sources of water. Figure out whether a cracked pipe or a leaky air conditioner caused the black mold. A mold issue won't be fully resolved until the source of moisture has been corrected.
You also need to prepare a path to the affected area. Remediation crews often have a lot of equipment and will need to have plenty of room to maneuver.
3. Containment and Personal Protection Equipment
The cleanup and remediation process often releases mold spores from behind drywall or underneath carpeting. To prevent those spores from spreading throughout your building, technicians may put up plastic sheeting and close off the area where they are working. It's important that you keep the HVAC system turned off and limit any traffic through the affected space. Technicians may also wear boots, gloves, and other protective clothing to prevent the spread of spores.
4. Removal of Affected Materials
Any affected building materials that can't be cleaned will be removed from the building. This generally includes most porous items. Technicians may double bag drywall, carpeting, and other materials before disposing of them.
5. Cleanup and Disinfection
Mold cleanup crews may begin by applying a biocide to kill mold and prevent any further spread. Bleach is not a biocide. The chemicals used by professionals are approved by the EPA and may not be commonly available. After a waiting period for the biocide to kill the mold, crews will wipe up the mold or use specialized vacuums. The area may be repainted or whitewashed to seal the remaining materials and prevent new growth.
6. Time for Drying and Final Assessment
Once all of the treated surfaces have dried, the mold inspector will return to test for spores and to check air quality again. With the final assessment and reports complete and the original cause of mold growth has been corrected, it should be safe for people to return to the area. Black mold can cause a lot of damage in your building, but if you catch and treat it quickly, you can limit that danger and minimize any inconvenience.
Benefits of Pretesting
7/30/2021 (Permalink)
 Pretesting helps reduce the expense of claims.
When your commercial clients in Emporia, VA, need to fill out an insurance claim, it is in everyone's best interest to keep the total cost low. One of the reasons SERVPRO is a preferred vendor for many providers is its commitment to start each cleanup job with a thorough assessment. Here are several ways that pretesting helps reduce the expense of claims.
3 Advantages of Pretesting
1. Identifying Source
The first thing that certified mitigation experts do when they arrive on site is look for the source of the problem. For example, if they are there to repair water damage, they inspect the building for common causes:
- Pipe break
- Faucet leak
- Toilet overflow
- Unresolved storm damage
Identifying the source of the water loss helps to stop damage in its tracks. The cleanup team can restrict the flow of water to the area until the problem is resolved, thus minimizing claims expense.
2. Reveal Extent of Problem
Pretesting also shows how much damage your client's building has sustained. Just as an insurance agent or adjuster completes a walkthrough to verify the claim, SERVPRO technicians inspect the whole building to identify exactly which procedures are needed to mitigate the damage. Both you and your client can view this information as well as any updates to the process or the overall estimate through the Claims Information Center.
3. Prevent Secondary Damage
One of the most important results of a pretest is the prevention of mold growth or other secondary damage to the building. Knowing the full scope of the problem from the beginning reduces the likelihood that water damage will be left to fester and cause more issues in the future. The rigorous standards SERVPRO sets for its technicians ensure a job well done.
The first step to solving any problem is defining it properly. Pretesting allows cleanup experts to get a full picture of how much damage your client's building has so that they can formulate an appropriate mitigation process.
Benefits of Pretesting
7/30/2021 (Permalink)
Pretesting helps reduce the expense of claims.
When your commercial clients in Emporia, VA, need to fill out an insurance claim, it is in everyone's best interest to keep the total cost low. One of the reasons SERVPRO is a preferred vendor for many providers is its commitment to start each cleanup job with a thorough assessment. Here are several ways that pretesting helps reduce the expense of claims.
3 Advantages of Pretesting
1. Identifying Source
The first thing that certified mitigation experts do when they arrive on site is look for the source of the problem. For example, if they are there to repair water damage, they inspect the building for common causes:
- Pipe break
- Faucet leak
- Toilet overflow
- Unresolved storm damage
Identifying the source of the water loss helps to stop damage in its tracks. The cleanup team can restrict the flow of water to the area until the problem is resolved, thus minimizing claims expense.
2. Reveal Extent of Problem
Pretesting also shows how much damage your client's building has sustained. Just as an insurance agent or adjuster completes a walkthrough to verify the claim, SERVPRO technicians inspect the whole building to identify exactly which procedures are needed to mitigate the damage. Both you and your client can view this information as well as any updates to the process or the overall estimate through the Claims Information Center.
3. Prevent Secondary Damage
One of the most important results of a pretest is the prevention of mold growth or other secondary damage to the building. Knowing the full scope of the problem from the beginning reduces the likelihood that water damage will be left to fester and cause more issues in the future. The rigorous standards SERVPRO sets for its technicians ensure a job well done.
The first step to solving any problem is defining it properly. Pretesting allows cleanup experts to get a full picture of how much damage your client's building has so that they can formulate an appropriate mitigation process.
5 Tips for Preventing Mold Damage After Flooding
6/22/2021 (Permalink)
 After a flood it's important that you follow these steps to avoid mold damage.
Without mitigation, mold growth can begin 24 to 48 hours after a flood. These five tips can help you avoid this problem.
Tips to Help You Avoid Mold Damage
1. Remove Water Promptly
One of the most important steps to take is to remove standing water promptly. You can use a mop and bucket or rent vacuums created for the purpose. However, floodwaters can contain hazardous materials and should not be touched without wearing protective gear. In most cases, it is better to contact a flood remediation company in Emporia, VA, than to attempt to remove the water yourself.
2. Dry Wet Surfaces
Removing standing water will help prevent mold growth, but you also need to completely dry wet surfaces. Dry rags or mops can be used to soak up water on surfaces. Renting industrialized fans can also help dry out rooms quickly. However, using fans runs the risk of spreading any mold that may have already developed throughout your building.
3. Remove Wet Carpets and Rugs
Wet carpets and rugs take a long time to dry. Remove them from the building and place them outside to dry in the sunlight if possible. Have the rugs steam cleaned to remove contaminants.
4. Sanitize Surfaces
Once you have everything dried out, clean and sanitize surfaces to kill bacteria and other contaminants. Diluted bleach or over-the-counter cleaning and sanitizing solutions can be used.
5. Keep the Humidity Level Below 50 Percent
Mold grows best in an environment with humidity over 50%, so try to keep humidity levels in your building below this. If your business is located in a humid environment, try using a dehumidifier. You can also open windows and doors on days when the weather is sunny and dry to help lower humidity levels.
Preventing mold growth after a flood can be challenging. However, if you implement these tips quickly, you can increase your chance of success.
5 Tips for Preventing Mold Damage After Flooding
6/22/2021 (Permalink)
After a flood it's important that you follow these steps to avoid mold damage.
Without mitigation, mold growth can begin 24 to 48 hours after a flood. These five tips can help you avoid this problem.
Tips to Help You Avoid Mold Damage
1. Remove Water Promptly
One of the most important steps to take is to remove standing water promptly. You can use a mop and bucket or rent vacuums created for the purpose. However, floodwaters can contain hazardous materials and should not be touched without wearing protective gear. In most cases, it is better to contact a flood remediation company in Emporia, VA, than to attempt to remove the water yourself.
2. Dry Wet Surfaces
Removing standing water will help prevent mold growth, but you also need to completely dry wet surfaces. Dry rags or mops can be used to soak up water on surfaces. Renting industrialized fans can also help dry out rooms quickly. However, using fans runs the risk of spreading any mold that may have already developed throughout your building.
3. Remove Wet Carpets and Rugs
Wet carpets and rugs take a long time to dry. Remove them from the building and place them outside to dry in the sunlight if possible. Have the rugs steam cleaned to remove contaminants.
4. Sanitize Surfaces
Once you have everything dried out, clean and sanitize surfaces to kill bacteria and other contaminants. Diluted bleach or over-the-counter cleaning and sanitizing solutions can be used.
5. Keep the Humidity Level Below 50 Percent
Mold grows best in an environment with humidity over 50%, so try to keep humidity levels in your building below this. If your business is located in a humid environment, try using a dehumidifier. You can also open windows and doors on days when the weather is sunny and dry to help lower humidity levels.
Preventing mold growth after a flood can be challenging. However, if you implement these tips quickly, you can increase your chance of success.
Preventing Fire Sprinkler Flooding
6/11/2021 (Permalink)
 Fires Sprinklers in a Commercial Building
Many commercial business owners probably don’t think about the flooding effects of their fire sprinklers being activated. However, if this does occur, it is an issue that should be dealt with immediately, before it gets out of control and costs hundreds of thousands of dollars.
Of course, the obvious solution is preventing your businesses fire sprinklers from going off accidentally. Here are a few things you need to know about accidental fire sprinkler activation.
Preventing Accidental Fire Sprinkler Activation
Did you know that the modern fire sprinkler system is NOT activated by fire alarms or even smoke caused by burnt food in the employee break room? They actually have to be subjected to extreme heat that melts the metal sensors or bursts the red liquid bulb on the device. Here are a few common reasons that can cause this to happen and sprinklers to accidentally activate:
- Improper fire sprinkler system installation
- Vandalization of the system
- A factory accident
- Inappropriate use of the sprinkler heads
Preventing Loss by Taking Immediate Action
If the fire sprinklers do activate in your business, your first step should be to turn off the water. This is the first and most important step in any emergency flooding situation. Make sure that you have multiple people in your organization that know how to perform this task. Once the water is turned off, the next step is to begin the clean up process. With fire sprinklers, it is possible that hundreds of gallons of water have been released in a short period of time.
Therefore, water damage to machinery, equipment, electronics, walls and floors can happen very quickly. You should call a reputable and experienced water restoration company right away! The professionals at SERVPRO can quickly and properly dry every surface and reduce the risk of mold.
Preventing It from Happening Again
Once you have your initial cleanup underway, you should contact your insurance provider and work on preventing this from happening again. Your employees should be trained to never hang anything from the sprinkler head, or even touch it! You should also consider the placement of sprinkler heads. They should be in a location in which it is difficult for person, or even a machine, to accidentally come in contact with it.
While a flood in your business may seem inconceivable, you should take these steps to minimize damage in the event this does happen. If you do experience water damage in your commercial property, give us a call.
Preventing Fire Sprinkler Flooding
6/11/2021 (Permalink)
Fires Sprinklers in a Commercial Building
Many commercial business owners probably don’t think about the flooding effects of their fire sprinklers being activated. However, if this does occur, it is an issue that should be dealt with immediately, before it gets out of control and costs hundreds of thousands of dollars.
Of course, the obvious solution is preventing your businesses fire sprinklers from going off accidentally. Here are a few things you need to know about accidental fire sprinkler activation.
Preventing Accidental Fire Sprinkler Activation
Did you know that the modern fire sprinkler system is NOT activated by fire alarms or even smoke caused by burnt food in the employee break room? They actually have to be subjected to extreme heat that melts the metal sensors or bursts the red liquid bulb on the device. Here are a few common reasons that can cause this to happen and sprinklers to accidentally activate:
- Improper fire sprinkler system installation
- Vandalization of the system
- A factory accident
- Inappropriate use of the sprinkler heads
Preventing Loss by Taking Immediate Action
If the fire sprinklers do activate in your business, your first step should be to turn off the water. This is the first and most important step in any emergency flooding situation. Make sure that you have multiple people in your organization that know how to perform this task. Once the water is turned off, the next step is to begin the clean up process. With fire sprinklers, it is possible that hundreds of gallons of water have been released in a short period of time.
Therefore, water damage to machinery, equipment, electronics, walls and floors can happen very quickly. You should call a reputable and experienced water restoration company right away! The professionals at SERVPRO can quickly and properly dry every surface and reduce the risk of mold.
Preventing It from Happening Again
Once you have your initial cleanup underway, you should contact your insurance provider and work on preventing this from happening again. Your employees should be trained to never hang anything from the sprinkler head, or even touch it! You should also consider the placement of sprinkler heads. They should be in a location in which it is difficult for person, or even a machine, to accidentally come in contact with it.
While a flood in your business may seem inconceivable, you should take these steps to minimize damage in the event this does happen. If you do experience water damage in your commercial property, give us a call.
4 Ways To Lower Business Interruption Flood Loss
5/28/2021 (Permalink)
 Flooding can lead to severe damage to your building.
Wherever you locate your business, there's always some risk of flooding, however small it is. It could be a result of a broken pipe or heavy rainfall. Your employees, clients and overall business need a plan in place for the unexpected so you can minimize the impact on your company if the worst occurs.
Minimize the Impact of Business Interruption Due to Water Damage
1. Identify Risks
To identify risks that could potentially cause business interruptions, you must assess preventable risks versus ones that aren't. Then, you can identify each element involved, including your property's vulnerability to the threat, all of your assets that are at risk and the total impact if it happens. How likely is the chance of a flood? How severe would the result of a flood be on your business?
2. Analyze the Impact of the Risks
To fully prepare, you must analyze the impact of potential flooding risks to estimate the costs of the various interruptions. These can include lost income for the business and employees, expenses to fix the problems, business delay, and multiple fines and penalties the company might incur.
3. Identify Ways of Preventing and Mitigating Risks
You'll need to identify any preventable hazards that could occur. Then, determine how to avoid these hazards from occurring. Some risks like large water damage from natural disasters are unavoidable. You must be proactive, taking measures to control and contain the hazards as much as possible before they occur. Part of this preparation is knowing which water damage restoration professionals to call.
4. Review Your Insurance Coverage
Business interruption insurance is helpful for property damage that suspends business operations. Make sure you understand the details of your insurance policy to know what's covered and what's not, including limits and exclusions.
A business can be susceptible to many negative factors. Knowing how to protect your Surry, VA, property and minimize the risk of significant damage from flooding can lessen the worry.
4 Ways To Lower Business Interruption Flood Loss
5/28/2021 (Permalink)
Flooding can lead to severe damage to your building.
Wherever you locate your business, there's always some risk of flooding, however small it is. It could be a result of a broken pipe or heavy rainfall. Your employees, clients and overall business need a plan in place for the unexpected so you can minimize the impact on your company if the worst occurs.
Minimize the Impact of Business Interruption Due to Water Damage
1. Identify Risks
To identify risks that could potentially cause business interruptions, you must assess preventable risks versus ones that aren't. Then, you can identify each element involved, including your property's vulnerability to the threat, all of your assets that are at risk and the total impact if it happens. How likely is the chance of a flood? How severe would the result of a flood be on your business?
2. Analyze the Impact of the Risks
To fully prepare, you must analyze the impact of potential flooding risks to estimate the costs of the various interruptions. These can include lost income for the business and employees, expenses to fix the problems, business delay, and multiple fines and penalties the company might incur.
3. Identify Ways of Preventing and Mitigating Risks
You'll need to identify any preventable hazards that could occur. Then, determine how to avoid these hazards from occurring. Some risks like large water damage from natural disasters are unavoidable. You must be proactive, taking measures to control and contain the hazards as much as possible before they occur. Part of this preparation is knowing which water damage restoration professionals to call.
4. Review Your Insurance Coverage
Business interruption insurance is helpful for property damage that suspends business operations. Make sure you understand the details of your insurance policy to know what's covered and what's not, including limits and exclusions.
A business can be susceptible to many negative factors. Knowing how to protect your Surry, VA, property and minimize the risk of significant damage from flooding can lessen the worry.
Prevent Flood Damage With Advance Preparations
4/15/2021 (Permalink)
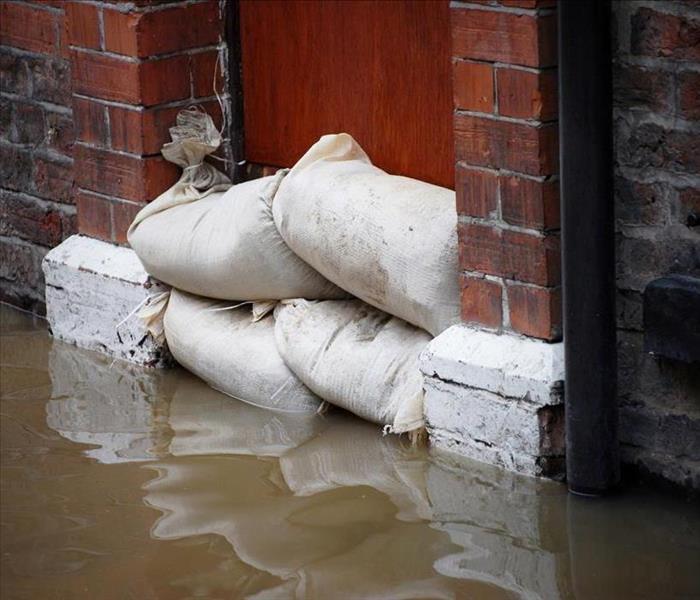
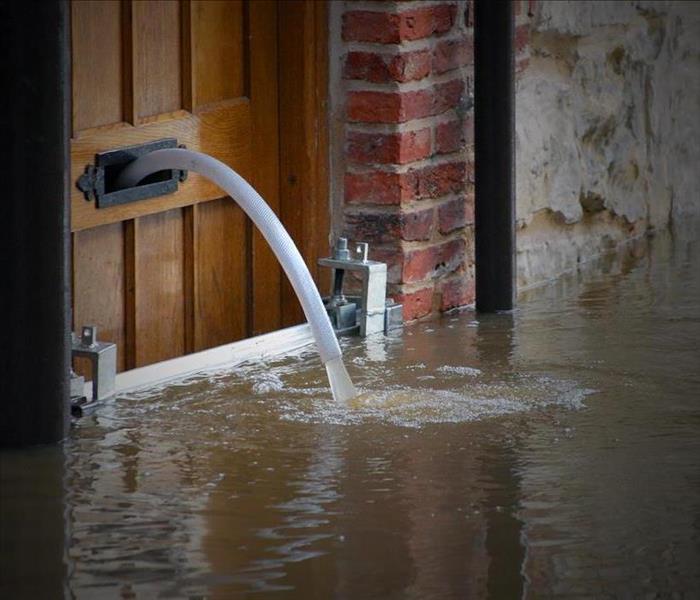
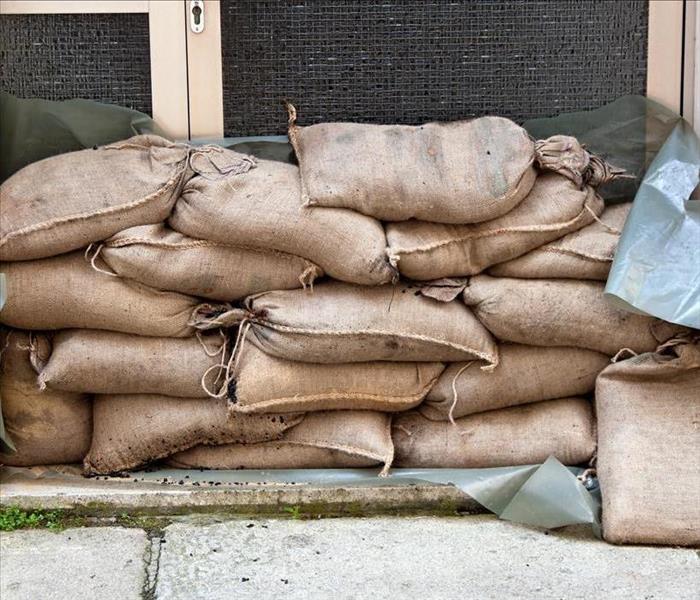 Use proper materials to prevent flood damage
Flooding is one of the most common types of damage after a natural disaster. It can happen anywhere, during any time of the year, and as the result of many causes.
Prevent Flood Damage
One of the best ways to prevent flood damage is to prepare before any signs of trouble:
- Consistently inspect and repair check valves and vulnerable spots where sewer and utility lines enter your facility.
- Protect vulnerable equipment, such as appliances, computers, and heaters, by moving them above the water level.
- Reach out to Surry, VA, water damage cleanup and prevention crews for tips on improving the watertight qualities of your building.
- Contact your insurance provider to be sure your policy includes water damage and for specific damage prevention advice.
Once you've done what you can to minimize any damage if water does get into your building, the next step is to keep as much flood water out when storm damage is imminent.
Water Control Supplies
There are several items you can purchase and keep on hand that are helpful when flooding occurs:
- Keep sandbags on hand to place around doors and windows.
- Store flood boards for your doors, so water doesn't get in when doors are opened.
- Keep a pump on hand to remove floodwater.
- Plastic sheeting, plywood, nails, and hammers are necessary for protecting vulnerable areas of the facility.
- Include a few shovels in your storage.
- Make sure you have first aid emergency kits installed around your facility, so they are easy to access.
With the right supplies on hand, you and your employees may feel more confident when rain or rising rivers threaten your business.
Routine Training and Education
Finally, you and everyone in your building should know how to behave when your facility is threatened. Create a flood plan that includes contact information for emergency response teams, anyone involved in caring for the building, and other critical team members. This plan should also include posted maps that show evacuation routes, shut-off points, and first aid kits.
When flooding does happen, you don't have much time to respond. When you've prepared, however, your employees know how to respond quickly for safety and damage control.
Prevent Flood Damage With Advance Preparations
4/15/2021 (Permalink)
Use proper materials to prevent flood damage
Flooding is one of the most common types of damage after a natural disaster. It can happen anywhere, during any time of the year, and as the result of many causes.
Prevent Flood Damage
One of the best ways to prevent flood damage is to prepare before any signs of trouble:
- Consistently inspect and repair check valves and vulnerable spots where sewer and utility lines enter your facility.
- Protect vulnerable equipment, such as appliances, computers, and heaters, by moving them above the water level.
- Reach out to Surry, VA, water damage cleanup and prevention crews for tips on improving the watertight qualities of your building.
- Contact your insurance provider to be sure your policy includes water damage and for specific damage prevention advice.
Once you've done what you can to minimize any damage if water does get into your building, the next step is to keep as much flood water out when storm damage is imminent.
Water Control Supplies
There are several items you can purchase and keep on hand that are helpful when flooding occurs:
- Keep sandbags on hand to place around doors and windows.
- Store flood boards for your doors, so water doesn't get in when doors are opened.
- Keep a pump on hand to remove floodwater.
- Plastic sheeting, plywood, nails, and hammers are necessary for protecting vulnerable areas of the facility.
- Include a few shovels in your storage.
- Make sure you have first aid emergency kits installed around your facility, so they are easy to access.
With the right supplies on hand, you and your employees may feel more confident when rain or rising rivers threaten your business.
Routine Training and Education
Finally, you and everyone in your building should know how to behave when your facility is threatened. Create a flood plan that includes contact information for emergency response teams, anyone involved in caring for the building, and other critical team members. This plan should also include posted maps that show evacuation routes, shut-off points, and first aid kits.
When flooding does happen, you don't have much time to respond. When you've prepared, however, your employees know how to respond quickly for safety and damage control.


 24/7 Emergency Service