


 24/7 Emergency Service
6 Essential Steps To Cleaning Up a Roof Leak
3/10/2022 (Permalink)
 Cleaning Up a Roof Leak will be Easier if you Follow These Essential Steps.
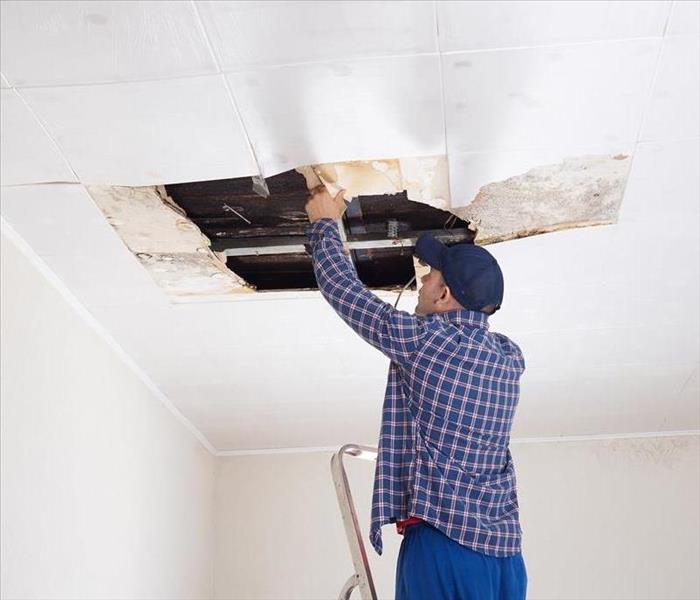
Business owners in South Boston, VA, may discover a roof leak well after it started. Unfortunately, openings within the structure often appear over time, gradually allowing moisture into the ceiling. Wood and insulation absorb the dampness, sometimes hiding it from plain view. Eventually, when enough harm happens, stains and leaks appear, finally signaling trouble.
Proprietors should take the situation seriously, grabbing more than a bucket and a mop—the roof and any attic structure demand close examination to determine the extent of the devastation. In addition, a thorough clean-up is required to avoid long-term harm and prevent extensive issues to the upper structure. Therefore, when employees or management observe a leak, be sure to follow the following six steps.
Six Essential Steps to Consider if you have to Clean Up a Roof Leak
1. Call Roof Leak Professionals
Business owners might think a quick patch to the ceiling solves the complication; however, that choice acts as a bandaid to what could be a much larger wound. Instead, it's imperative to locate the water intrusion's origin. Locate a local water remediation company, and request their assistance. These specialists begin by surveying the leak and determining the source. They then put together an action plan to resolve the primary problem and sanitize and restore the facility.
2. Tend to the Roof's Condition
Often the moisture gets into the building through damaged or missing shingles. Because they no longer cover the exterior adequately, they have allowed for a point of entry. Immediately seal it off, placing a tarp on top to minimize additional penetration.
3. Move Valuables to Another Room
Although water seems harmless, it poses quite a risk to your property and possessions. A leak that persists could drip consistently onto your products, furniture and equipment, causing them to break, rust or erode. Furthermore, trapped wetness leads to increased odor, mildew and mold, especially porous materials. Minimize your complications. Move possessions out of the way where they remain dry. This decision reduces loss and could save you time, hassle and money.
4. Eliminate Damp Materials
The restoration crew tests various surfaces to determine moisture levels. Expect the team to look at the damaged roof, ceiling and drywall. They will tear out anything meeting heavy saturation levels. The dampness encourages mold spore reproduction, and because these substances soak up quickly and easily, it's hard to know the depth of the concern. Removal lowers the chances of future contamination and difficulties.
5. Disinfect and Dry the Area
Unaffected portions may still have some dampness. Industrial dehumidifiers extract this fluid from the air and other surfaces. When testing indicates appropriate moisture levels, the experts may sanitize the space.
6. Restore for Regular Use
When the cleaning is done, repair the roof's integrity and rebuild the room to meet your company's needs. This step remains last because it's vital to know that any underlying issues are evaluated and tended to first.
A roof leak is a severe event, so don't allow it to linger. Something seemingly minor could significantly impact your building's structure and your valuable's integrity. Therefore, quickly secure the location from additional harm, and safeguard materials. Then, reach out to professionals to assist with the situation, allowing these experts to locate the problem's source, arrange for appropriate cleaning, and remediate the harm.